Sunday, 29 April 2012

Trouser Pockets

I found these relatively straightforward, particularly compared to jetted and welt pockets. I am glad that I took the time to learn this process as although I wont be making trousers for this project, knowing how to do these pockets will be useful in the future. I think my sample is fairly neat, although I am not sure if the seam should cover more of the uprights, as the mouth is not completely at the side. I think this is as a result of sewing the mouth 1/2" away from the edge rather than 1/4". I would like to attempt the slanted trouser pockets next as I think these will be a different challenge.


Saturday, 28 April 2012

Reflection on the project

As I am beginning my work placement on Tuesday, I am not able to progress much further with my jacket as I need to be shown the next steps. I am disappointed that I will not be able to finish my jacket, but think that I will gain valuable skills and experience through completing a work placement. Hopefully, at some point in the future, I will be able to complete my jacket as tailoring is a particular area of interest to me and something I think I might like to continue in my third year.

At this point, I am pleased with the work I have done on my jacket. I have worked hard to ensure my pockets are of a standard I am happy with as well as other aspects of my jacket, such as the pad stitching. I feel like I have learned some new skills, and was happy that I was able to learn how to do trouser side entry pockets and a fly, because although I am not making trousers for this project, it is useful to know for the future.

With regards more generally to tailoring, I have continued to be aware of the importance of precision and of getting things right the first time. I have tried to follow this throughout the project, but found it particularly challenging with regards to the pockets as to ensure the stripes were matching and precise, I had to unpick and re sew the jets a few times. Nevertheless, I have enjoyed the challenges of the project and finding ways to overcome them as well as working more independently.

Friday, 27 April 2012

Fitting

I was able to watch the fitting of another girl in my group and found it really useful, particularly with regards to what to look for when fitting a suit. Below are some key points:

  • We first looked at the fit of the trousers. With these, the fishtails should be about 3" apart. Similarly the first brace buttons should sit 3" from the CF and the second a further 3" from this.
  • Usually the trouser pockets and fly would be completed by the tailor before the fitting as any alterations that need to be made are done to the back pieces.
  • When looking at the length of the trousers, ensuring there is a break line is key. This is a crease in the trouser leg just above the shoe. The bottom of the trouser usually hits the bottom of the heel (above the sole of the shoe). The hem can be shaped to make it shorter at the front to fit better over the shoe.
  • It is usually expected at a fitting to at least have calico sleeves in as this helps to visualise what the completed jacket will look like.
  • When looking at the jacket, the first thing to do is to go to the back before closing the front. The across back should be smooth. The front should then be pinned, checking this does not distort the back. Check around the arm to ensure there is no 'air'.
  • With regards to the lapel, this is normally cut after the fitting with the seam allowance being folded over and tacked so it is easy to adjust. This is important as it is a style area and one which the designer is likely to want to change.
  • It is almost always the case that you need to scoop out more around the armhole at the front so it doesn't bunch. This is marked with pins. If able to, it is helpful to snip into the seam allowance (obviously once the sleeve has been removed). This is to give the actor more confidence that he will have more ease when wearing the finished jacket. Be careful when doing this by putting your hand in between the shirt and scissors.
  • When sewing the side seams, it is most important to get the balance points at the armhole right and then the chest/waist points.
  • It is key when pinning the jacket length to check with the designer and look in the mirror.
  • It was interesting to see the canvas and the felt doing their job by creating a smooth front.
The fit of the suit was good and looked nice. I would have liked to have a fitting with my jacket but ran out of time. I hope that perhaps when I am able to continue with my jacket I will have a fitting. I am pleased, however, that I have been able to watch a couple of fittings as this had added to my knowledge and understanding of tailoring.

Wednesday, 25 April 2012

Pad Stitching - Lapel

Today I completed the pad stitching for the lapel, which is similar to that which I have done for the canvas. It was slightly more complicated, involving a few steps, but not as challenging as matching the pockets. Overall, I think the pad stitching is relatively neat, although on the first lapel the stitches should be closer together. Therefore, when stitching the second lapel I took this on board and think it has turned out better. 

Below are photos and a short explanation of the process, a more detailed version of which I will include in my workbook.

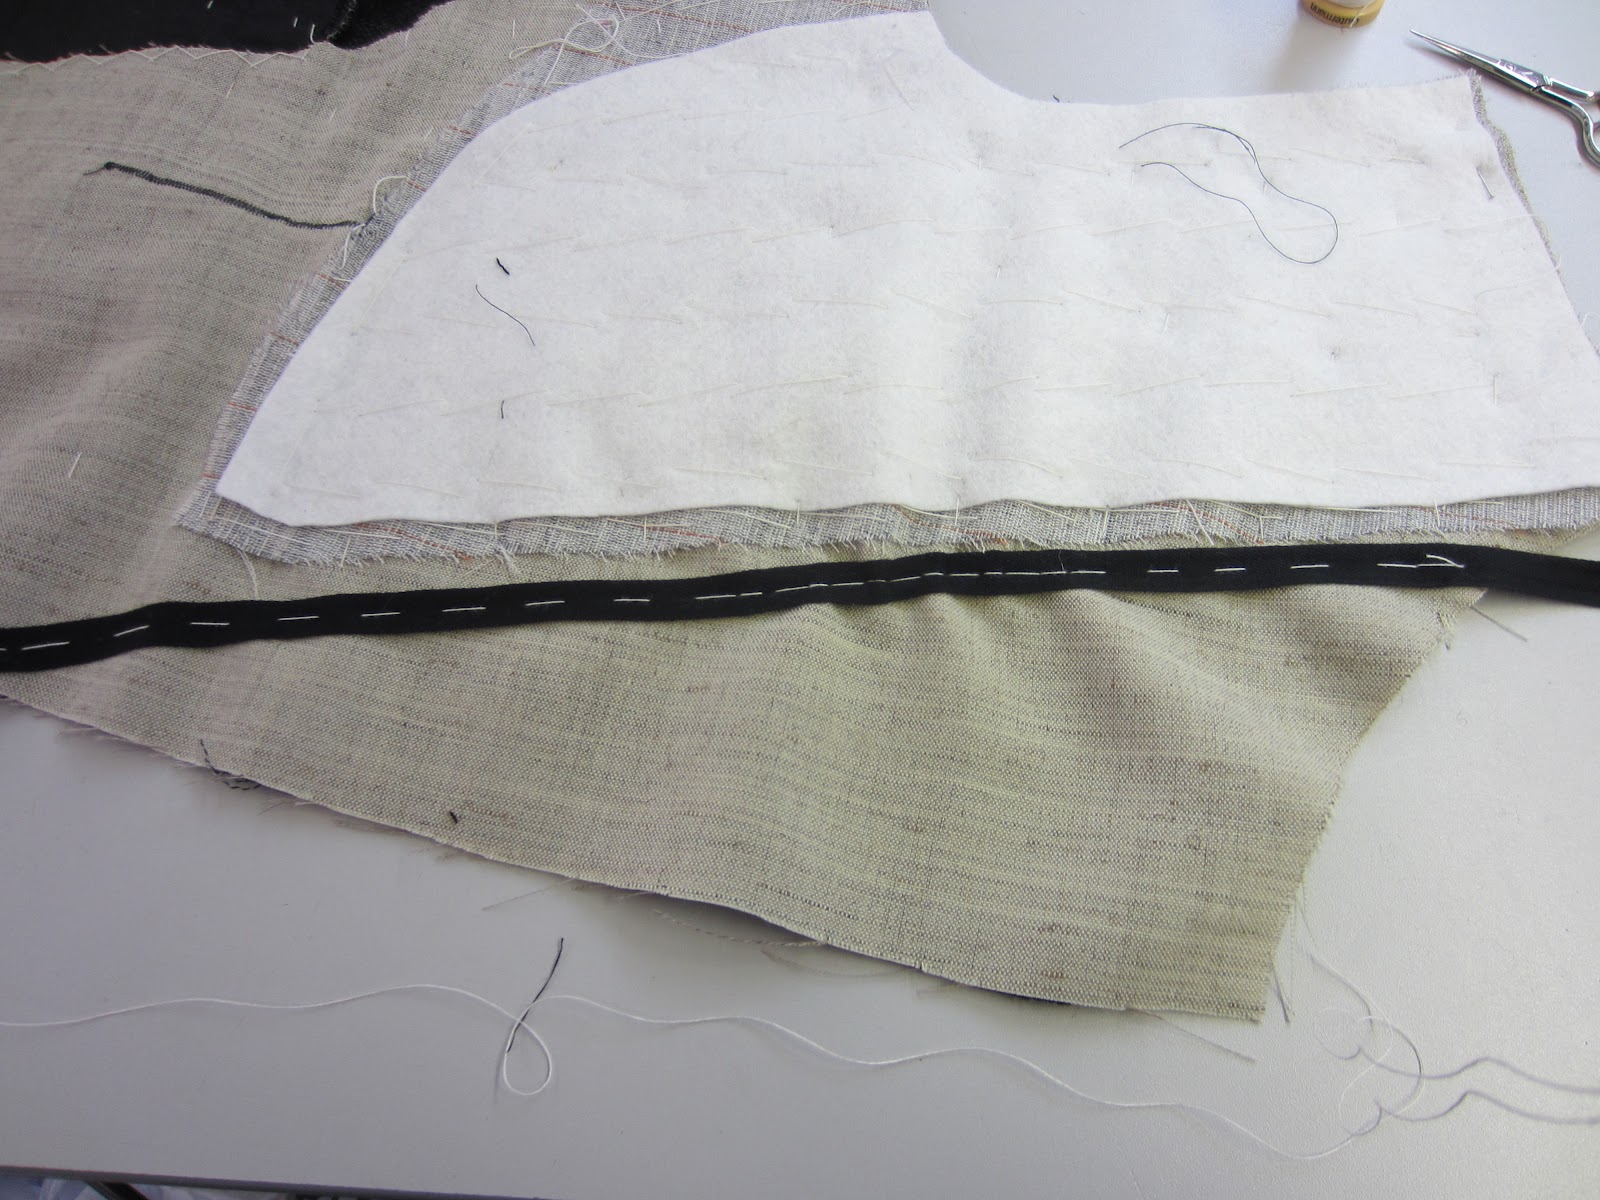
1.Tack a piece of cotton tape (1/2" or 1cm wide) centred on the middle of the break line, leaving extra either end. Use a running stitch. About 1/3 of the way up from the bottom of the lapel pull the tape to slightly gather the lapel and hold with a back stitch. Do not continue up to the top of the lapel, instead reverting back to a running stitch (see picture).


2. Pad stitch the edges of the tape with matching thread (to the top cloth). The stitches should be about 1cm long. Also pad stitch the edges of the breast felt and shoulder canvas down.


3. Again using matching thread, pad stitch the canvas to the top cloth. Ensure to only do this in the lapel not seam allowance. The stitches should once again be about 1cm long and each stitch should start halfway down the stitch of the previous row. As you stitch, push the canvas a tiny bit towards the tape. this will help to roll the lapel. The corner of the lapel should have the stitches going in a different direction (see picture below).

First Lapel - stitches need to be further apart
Second Lapel - stitches closer together
Rolled Lapel


I found this process particularly interesting as by moving the lapel when stitching the tape, and pushing the canvas a tiny bit on each row of stitching, it means the lapel rolls and prevents it from bowing. I enjoy learning about these techniques and processes as it is what differentiates a bespoke tailored jacket from mass produced jackets to an extent, and you begin to understand the amount of work and skill that goes into the work.

Sunday, 22 April 2012

Pad Stitching

After completing the pockets and basting them down so they do not move, the next stage is to cut hair canvas, shoulder canvas and breast felt and pad stitch these together before basting them to the fronts of the jacket. The purpose of this is to stiffen the fronts of the jackets, as well as to build up the front shoulder area to compensate for the dip of the shoulder blade. 

I enjoyed doing the pad stitching and found it relatively straight forward, and I think it has turned out fairly neat and even. In order to remember how to do it in the future, I made a short video, almost as a tutorial/instruction guideline as it is a new technique. I thought making a video would be a more interesting and visual way of producing instructions, particularly as I can upload it here onto my blog. I will do paper instructions to go in my workbook as a hard copy, and include diagrams as I'm not sure how clear the video is, particularly with my basic video editing skills! 


Once I had completed the pad stitching, I basted the canvas to the jacket fronts in a similar manner as I had done with my waistcoat with three lines of tacking (one down the centre, one across the shoulder around the armhole, and one down the front) and was surprised how easily I could remember the technique of gently stretching the cloth and doing fairly large stitches (though I did check my waistcoat instructions!).

At this stage, I feel as if my jacket is going well and I am pleased with the standard of my work, even if it is taking longer. I do understand, nevertheless, that I will need to become quicker at the techniques but as I am still learning new techniques I think it is important to do them correctly and then increase my speed through practice.

Thursday, 19 April 2012

Finished Pockets!!

I have finally finished all three of the outside jacket pockets! Overall, I am pleased with how they have turned out as they match fairly well. Although this took a while, I think not rushing and spending longer to get the stripes to match was a good idea, particularly as I would not have been happy with myself or the work had I not done so. My only concern is that the pockets are slightly bulky, but hopefully once the jacket is finished this will not be a problem. The welt pocket took less time than those on my waistcoat (and seemed less complicated!) because I have done it before, so hopefully with practice I will be able to do both types of pockets with relative ease and speed.


Wednesday, 18 April 2012

More Pockets...

I have found sewing the pockets on my jacket much more challenging than the sample, particularly because both pockets need to be identical. It has also been extremely time consuming enuring the jets match up - this has been most difficult once again with the top jet because of the flap and I have had to unpick and re-sew this several times. This is extremely frustrating as I have not yet been able to get the stripes to match satisfactorily and am concerned the more times I try to sew it, the messier it will be. After spending several hours on this today, I have given up and will attempt it again tomorrow, though this has made me behind schedule, as I idealy wanted to get all of my pockets done by tomorrow and I still need to do my breast pocket.