Sunday, 15 April 2012

Pockets

My jacket has two pockets with flaps which need to be constructed once the darts are sewn. Because I had not sewn a pocket with a flap before, I decided to do a sample. I found the flap fairly challenging and time consuming, partly because my first attempt did not lay flat and was too small for the mouth of the pocket. This was due to the fact that only seam allowance had been added which did not allow for the lip on the reverse side of the pocket, and the lining being pulled too much. I decided to see if I could find a solution to this problem by looking in tailoring books and found a slightly different way of constructing the flap. This produced a much better result, and allowed me to continue with the rest of my sample.

First flap: 


Second flap:


Flap Instructions from 'Classic Tailoring Techniques' by R. Cabrera & P.F. Meyers:


I used the pattern that accompanied the instructions as a guideline for the shape of the flap

The rest of the pocket was fairly straight forward, and I enjoy constructing jetted pockets in particular. Nevertheless, when I came to sew the flap into the top jet I found this difficult as the flap got in the way of being able to easily match the top jet - I had to unpick my first attempt and do it again. Despite this, I think my sample has turned out fairly successfully with a few imperfections. I hope to complete the pockets on my jacket as successfully, although will have the added challenge of ensuring both sides are the same.

Finished poket sample:


Thursday, 12 April 2012

Next Stages

After having a meeting with my tutor and group, the next stage was to add inlays to the pattern and then cut out my jacket. This was fairly simple, although I had to be careful to match up the herringbone stripes, and realised that the herringbone wouldn't allow the pattern to be mirrored along the CB. I found cutting out and mark tacking much easier and quicker than with the waistcoat.

During the afternoon, I had the chance to observe a 3rd year fitting of a 1920s tailcoat and a kilt and jacket, which was very interesting. I was able to understand the key things to look for at a fitting, such as how the across back of the jacket should be smooth, the sleeve placement, as well as the length of the sleeves and trousers. Seeing the skilled work that had been put into the suits has given me something to aim towards in this project and the future if I continue with tailoring in my 3rd year.

I now need to continue to work hard to get my pockets completed in time for the next session. This will be challenging as I have to ensure the pattern matches and I have to include flaps which is something I have not done before.

Monday, 9 April 2012

Development of Tailoring and Menswear

Below is some of my research gathered from Norah Waugh's 'The Cut of Men's Clothes' and Penelope Byrde's 'The Twentieth Century: a visual history of costume'. 

'The Cut of Men's Clothes' (p.130-132):

The start of the C19th was a turning point for male tailoring. There was a revolution in the art of cutting, brought on by realisation that the systems in place were not suitable for the increased concentration on the cut and fit of men's garments. One innovation in particular, the tape measure, greatly contributed to the change in practice. With this new instrument, tailors were able to see and measure the proportions of the male figure, and from this worked out the first simple drafting system with a much more mathematical and scientific approach.

However, some soon realised that the simple breast measurement system was only suitable for well-proportioned figures. Tailors still cut from patterns but these were now drafted from a basic block and adapted to the measurements and anatomy of the individual customer. For wholesale mass production, patterns for the main figure types were used.

Although the cutting of a garment is important, it is by no means the whole art of tailoring - the subtle techniques of interlinings, padding, pressing and sewing etc. are also key. The scientific approach developed in the C19th century has made tailoring a highly skilled profession.

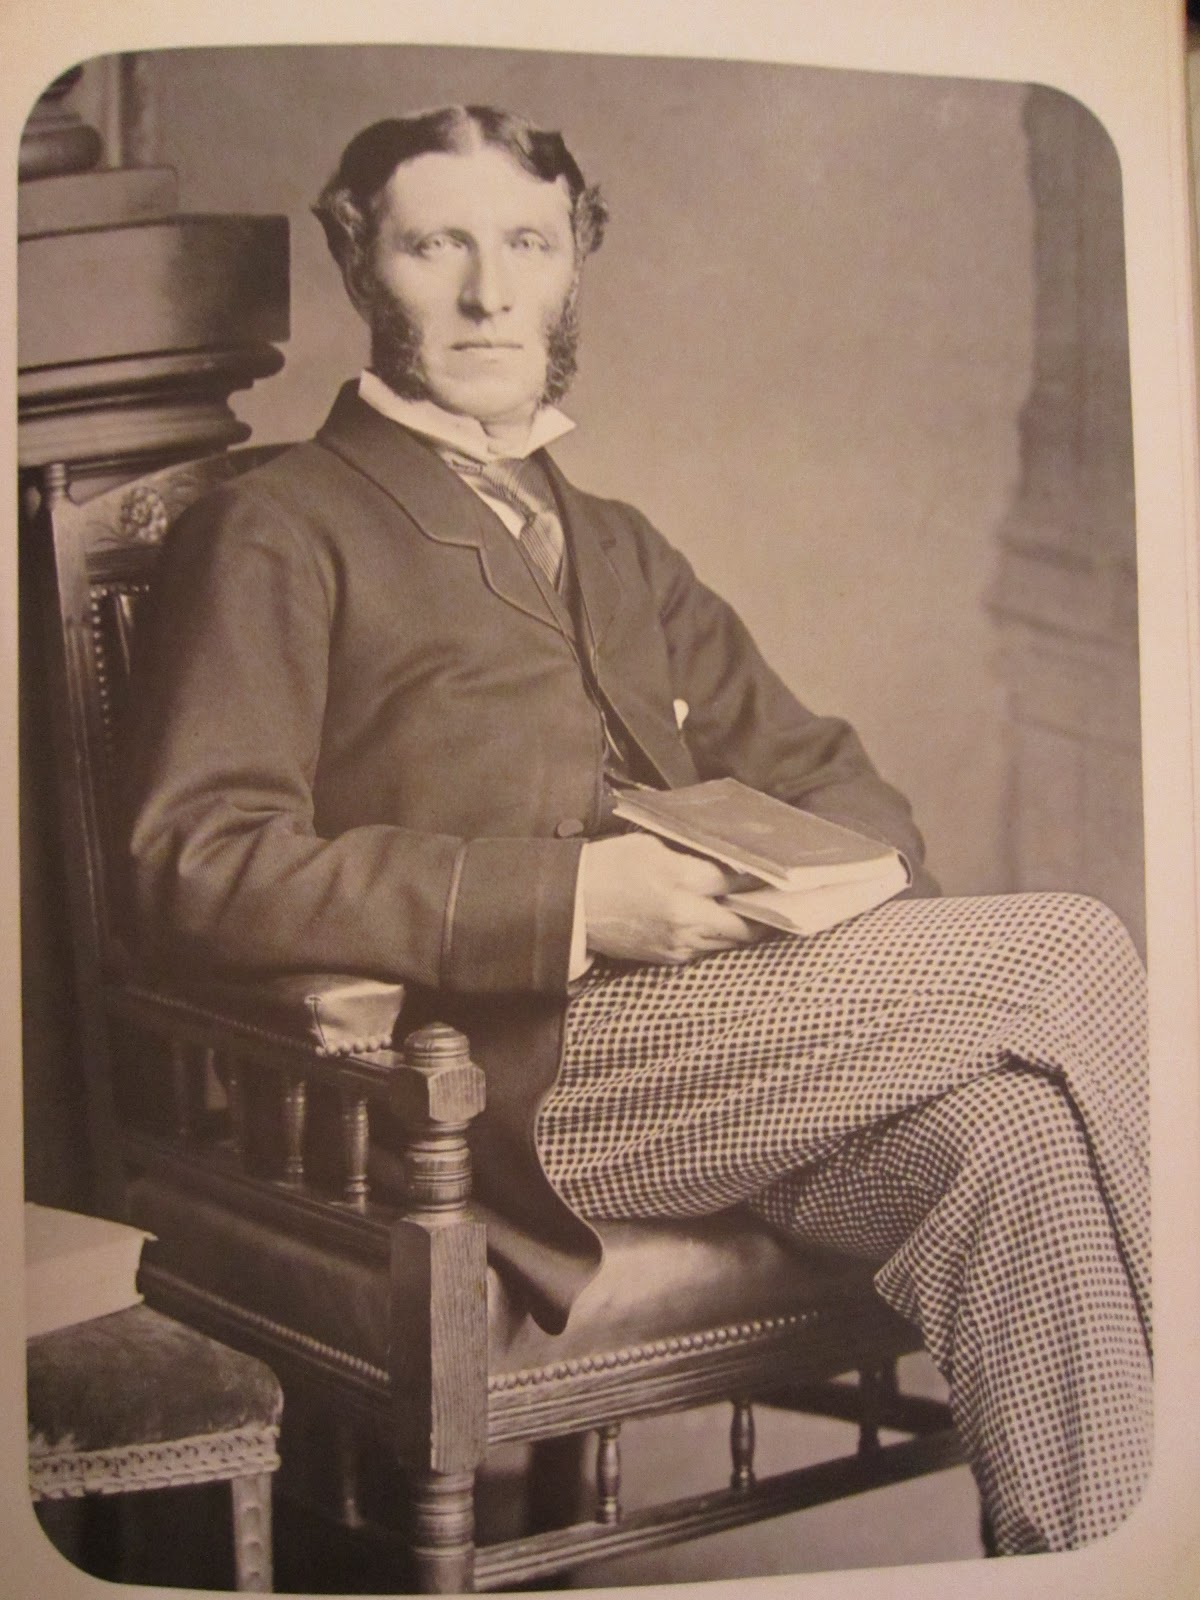
Lounge Jacket (p.115)

This derived from the simple two-seamed paletot by taking a long dart from the under-arm slightly forward and extending it down to the waist - giving it a better fit. The lounge jacket had become very popular for informal wear by the 1870s, and in the 1880s the 'dress lounge' appeared for informal evening wear.

'The Twentieth Century: a visual history of costume' (p.13-14):

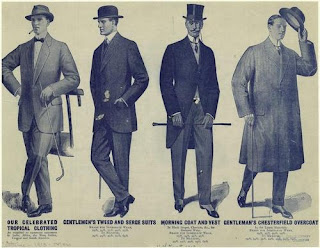
At the beginning of the century, men's dress was generally formal and dictated by their occupation and the time of day. The frock coat and morning suit were correct for day wear, but the three piece lounge suit was worn for less formal occasions. The cut of the suit was fairly narrow.

The second decade of the century was dominated by the First World War which drew attention away from civilian men's dress. During the 20s however, the frock coat was out of fashion and the mourning suit was reserved for more formal occasions. Professional or business men wore single or double breasted three piece lounge suits, the shape of which had changed quite considerably. Trousers became wider, together with the shoulders of the jacket and loosened at the waist to become much squarer in shape. This became even more exaggerated during the 30s, accentuated by shoulder padding, wide lapels and the double breasted fastening. Trouser legs were cut wide with turn ups.

Once again, the outbreak of war put an stop to any progress in fashion - 'new suits were allowed only a certain number of pockets and buttons, had single-breasted jackets and trousers no wider than 19 inches with no turn ups.'

By the 1950s, men's suits began to narrow, with slimmer trousers and more fitted jackets which had a natural shoulder line, smaller lapels and the single-breasted fastening. This was in part due to the influence of Italian designers and the so called 'Italian suit', cut in light cloths which resulted from new developments in the production of man-made fibres which produced lighter weight and crease resistant suitings.

Tuesday, 3 April 2012

Fabric!

After three trips to London I finally have my fabric! I went back to Fabric House where the similar fabric the owner had found was perfect, and I think I almost prefer it as the herringbone is subtler. It is about the same thickness, and although I am not sure its exact weight (it could be lighter than 14oz) I think it should be good to work with.

I also bought some silk lining fabric - I went for black as although the turquoise appealed to me, I thought black suited the fabric and time period better.


Finally getting my fabric is a big relief, particularly as it is something I am happy to work with and therefore will make the project more enjoyable. I also think the herringbone will provide a bit of a challenge, as I will have to ensure the pockets match and it goes in the same direction throughout the suit.

Friday, 30 March 2012

Fabric Shopping Take Two

I went back to Goldhawk Road today after asking the advice of my tutor who suggested to go for the heavier tweedy fabrics as the thinner, smoother fabrics tend to be for more modern suits. With a better idea of what to look for, I first headed to the shops which I remembered finding some nice fabrics in. In Fabric House I found a dark grey/black wool with a subtle herringbone fabric of quite a good weight.


Unfortunately, as I could have predicted, there was not enough fabric on the roll. I decided to have a look in the other shops to see if I could find anything similar, but nothing was quite the same, particularly with regards to the thickness. On return to Fabric House the shop owner was extremely helpful and said he would check his stock and let me know later that day if he could find any more.

I therefore went home once again without fabric, but I feel it is important to get the fabric choice right and to get something I am happy with and want to work with. Fortunately, the shop owner has found something he says is very similar and so I am going back tomorrow to see and hopefully buy it!

Although to some extent spending this much time fabric shopping has perhaps reduced the time that could be spent researching, as I have said above I think getting the right fabric is key.

Wednesday, 28 March 2012

Fabric Shopping...

Today I went fabric shopping in London, however had an unsuccessful day. I began in Goldhawk Road as this is where the cheaper fabrics tend to be. I had been advised by my tutor to get a 14oz wool and had looked at some samples at Uni to get an idea of the weight I would need. Below are photos of a few of those samples that I particularly liked.


 It was soon apparent that trying to find an appropriate fabric would be harder than I had anticipated. This was chiefly because no one knew the weights of the wools and many suggested that the thinner wools would be more suitable for a suit, as thicker wools tend to be used for coats. With little experience or knowledge of wools and suit fabrics, I found it extremely difficult to judge the weights by touch, with only the memory of the samples at Uni to go on. I was able to take a few pictures of wools in one of the shops as I was unable to get samples.


(I liked the purple checked fabric here even though I am looking for a plainer fabric)

The fabrics in Goldhalk Road generally ranged from £10-20.

Unsure of what to do, I headed to Berwick Street, more to see if I could get a better idea of the weight of fabric rather than to buy any, as fabrics are generally more expensive here. I did see some nice fabrics, however I hit the same problem as before and therefore continued to have trouble distinguishing the weights. I spoke to an very helpful shop assistant who advised me to choose something I wanted to work with or that would look right if I was unsure of what to get, and that you could always increase the thickness of the fabric by combining it with horse hair. I did get some samples and particularly like those from the Berwick Street Cloth Shop though these are too expensive (£45/m). I think I'd like to find something similar to the black herringbone as its fairly plain but has some detail.


I was disappointed that I did not get my fabric today, but I resolved on going home and doing some research on fabrics because I did not want to spend a large amount on fabric that might not be suitable. I think I should have done more research before going as I felt unprepared, but I did not know it would be so difficult. I have since come to the realisation that a 14oz wool might not have to be as thick as I think it should, as I think if the weave is tighter, it will produce a smoother and thinner feel and look.

Monday, 26 March 2012

Suit Images

 I have been meaning to put up more of my research over the past week than I have - this is mainly due to trying to get my costume for Battle for the winds completely finished, as well as focusing on pattern drafting and it being the end of term. I have decided on the image (or in fact a few images) that I want to use for reference and have checked them with my tutor.

Through my research I have found many jackets of the late Victorian age have small lapels. However, I did find a new style of lounge jacket with a bigger lapel, which I prefer and which I have decided to make. I found it difficult to find an image of a full suit of this style, and initially I only had the image below.


After looking in various Victorian photo books and at paintings I still had little luck but did find this image of Matthew Arnold, a poet and critic. Although the jacket is of the slightly different style, I like the trousers he is wearing and think it would be interesting to try and find a similar fabric. Despite the jacket not being quite the style I want to make, it is interesting to look at, particularly the edging around the cuffs and lapel.


I then came across this image on the internet that is the style I prefer and of a slightly later date (1913), which could explain why I was struggling to find images of it. When I showed these images to my tutor he agreed that I could make the trousers that Matthew Arnold is wearing and the newer style of jacket. However, I do like the turn up style of trousers seen in the image below.


Since then, I have found a few more images of similar suits, which I will also use for reference. I am going fabric shopping on Wednesday and so depending on what I find, will to some extent dictate the image I will most closely follow. I think it may be easier and look nicer to buy matching jacket and trouser fabric, particularly as I am under pressure as to what I will be able to make. As I only have 3 weeks after Easter, I don't want to make it more difficult for myself by choosing a decorative/patterned fabric.